Prerequisites
projectx-prod-vpchas been created with subnets configured.projectx-prod-jumpboxEC2 instance exists and is accessible.projectx-prod-websvrEC2 instance exists (or any EC2 instance for testing).My-Desktop-Key-Pairkey pair exists.- AWS CLI configured with appropriate credentials.
Network Topology
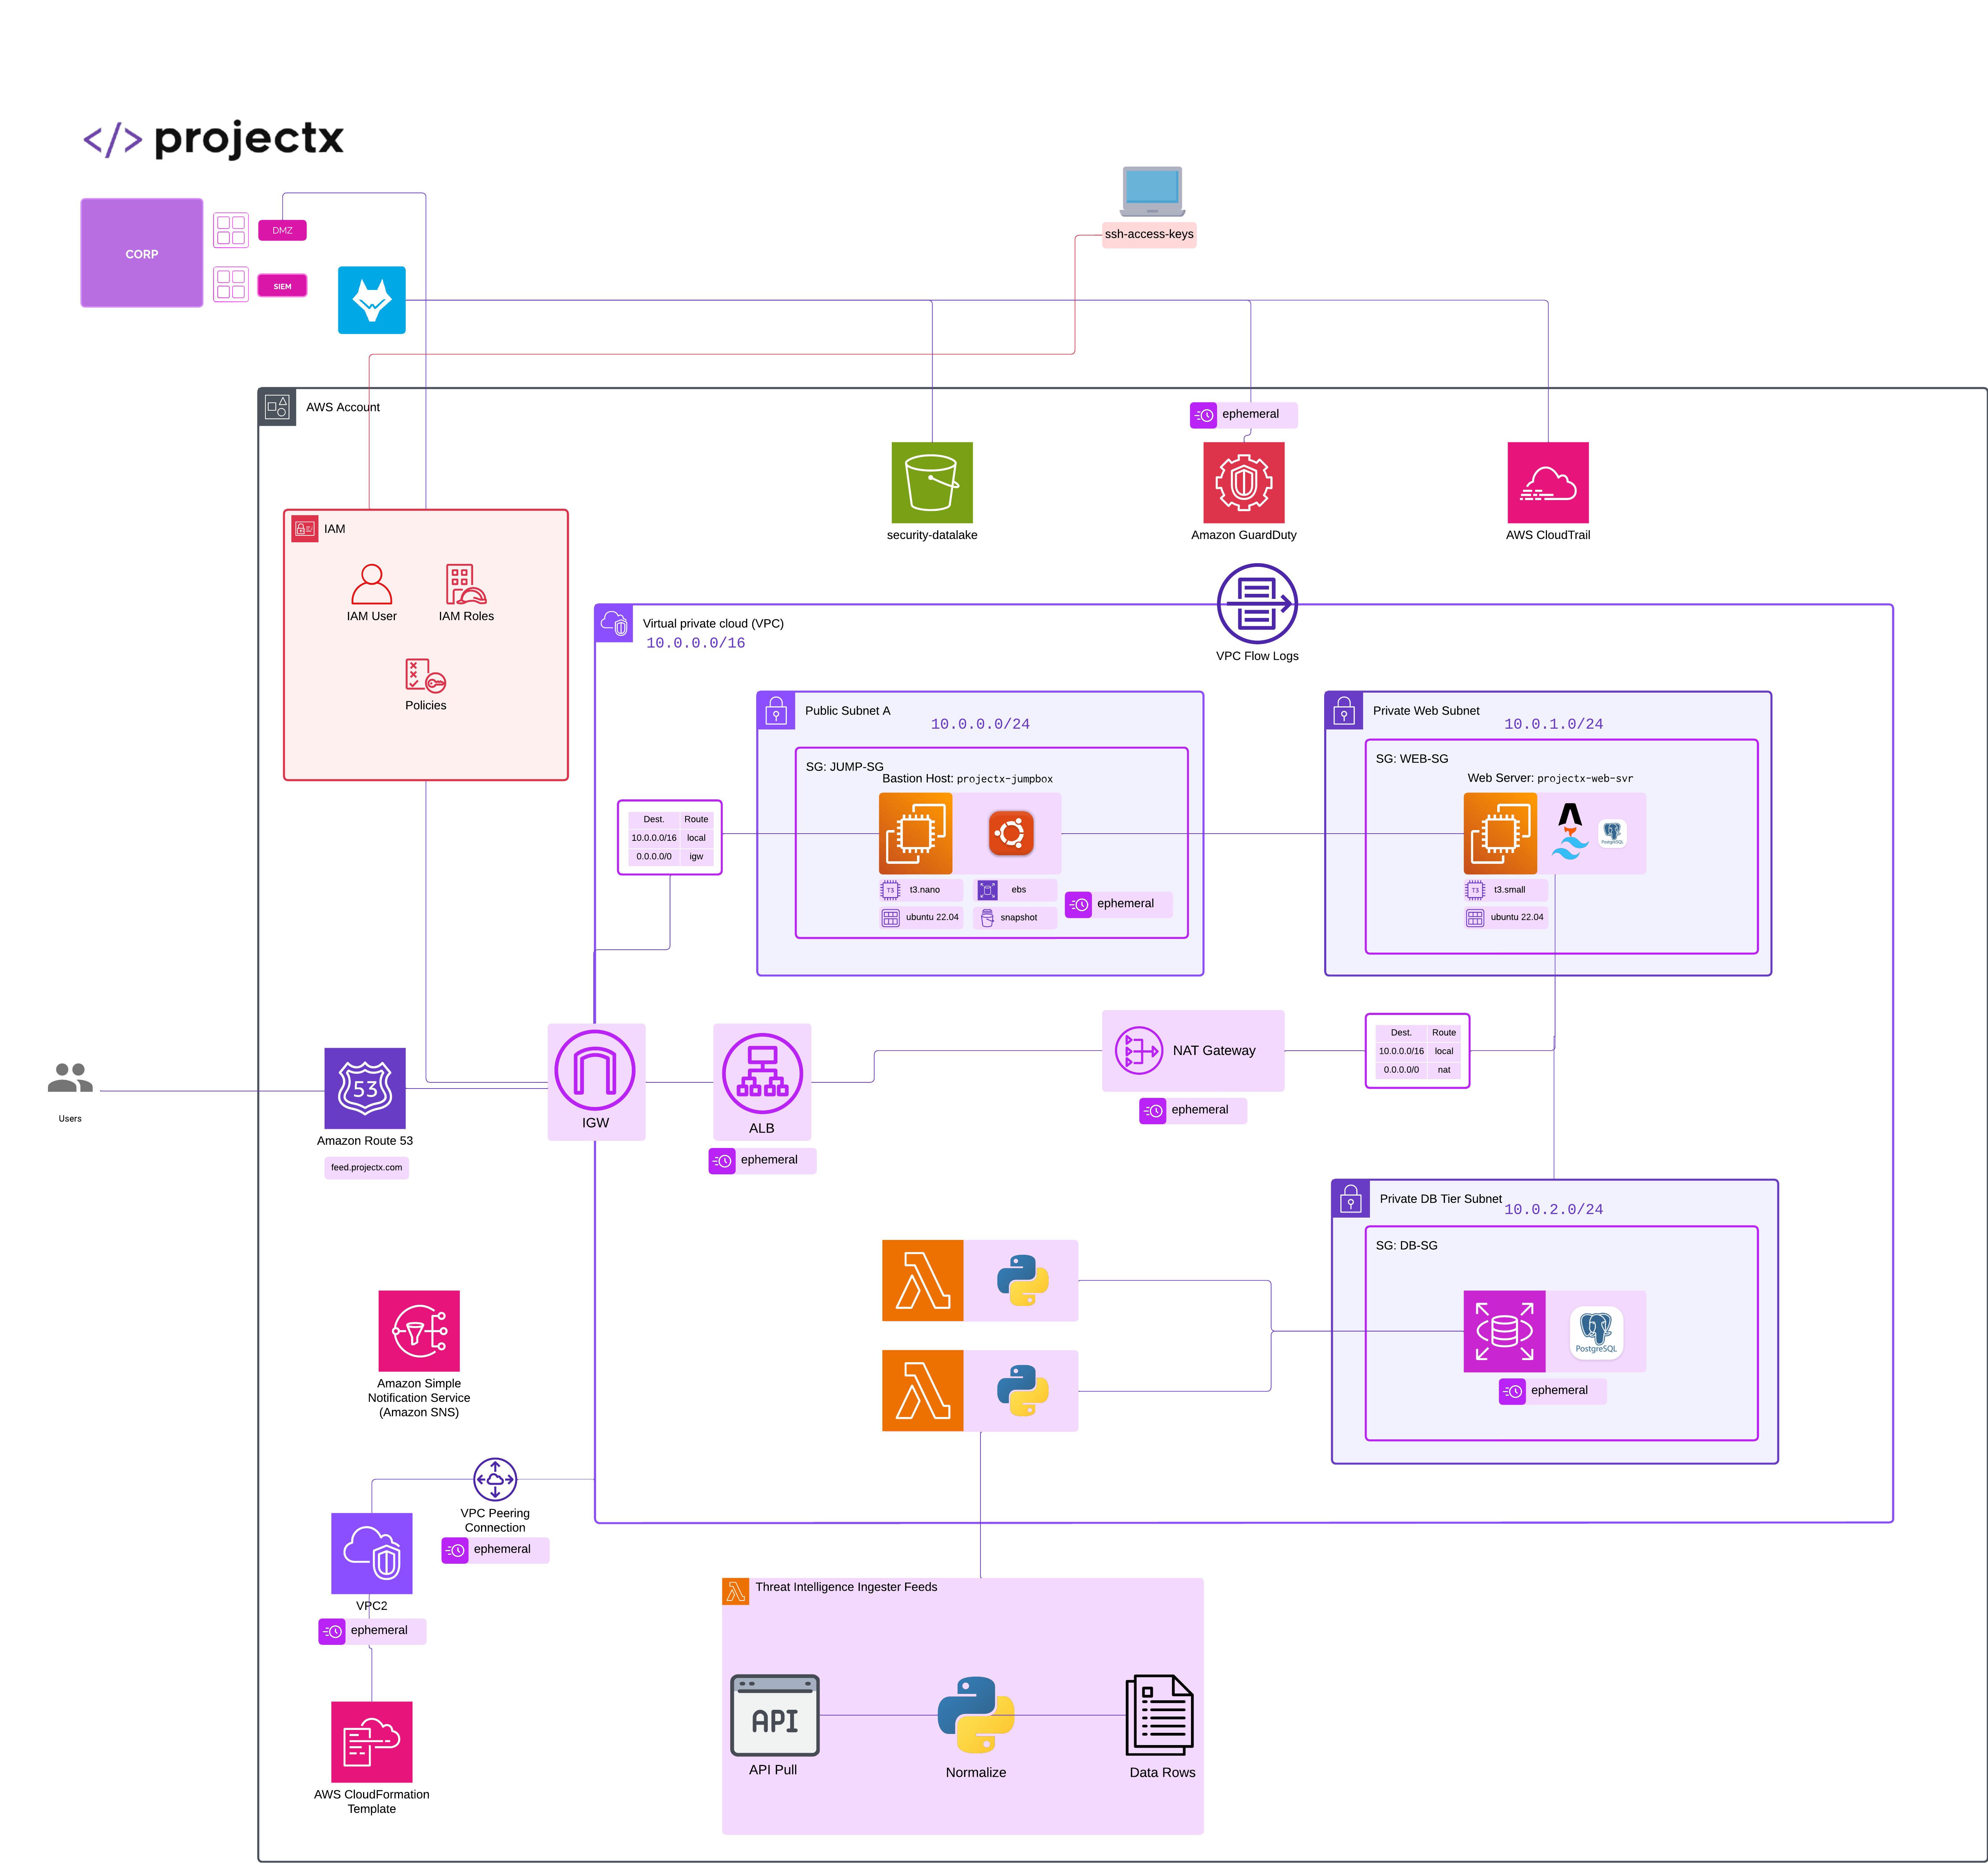
Overview
What is Elastic Block Storage (EBS)?
Elastic Block Storage (EBS) is a high-performance block storage service designed for use with Amazon EC2 instances. EBS volumes are persistent, network-attached storage that can be dynamically attached and detached from EC2 instances, making them ideal for databases, file systems, and applications that require persistent storage.
Key Features of EBS
EBS is primarily used as a data persistence mechanism where the underlying data or volume is independent of the EC2 instance. This means you could attach and detach EBS volumes between different EC2 instances while keeping the same data.
👉 Ephemeral Lab Note: Since this is an ephemeral lab, we'll clean up all resources at the end. In production, you would typically keep snapshots for backup and disaster recovery purposes.
Create an EBS Volume
Navigate to EBS Volumes
Open the EC2 service in the AWS Console.
In the left navigation pane, scroll down to Elastic Block Store and select Volumes.

Notice how we already have a few EBS volumes created. These were created when we deployed the jumpbox and websvr EC2 instances.
Click Create volume.
Configure Volume Settings
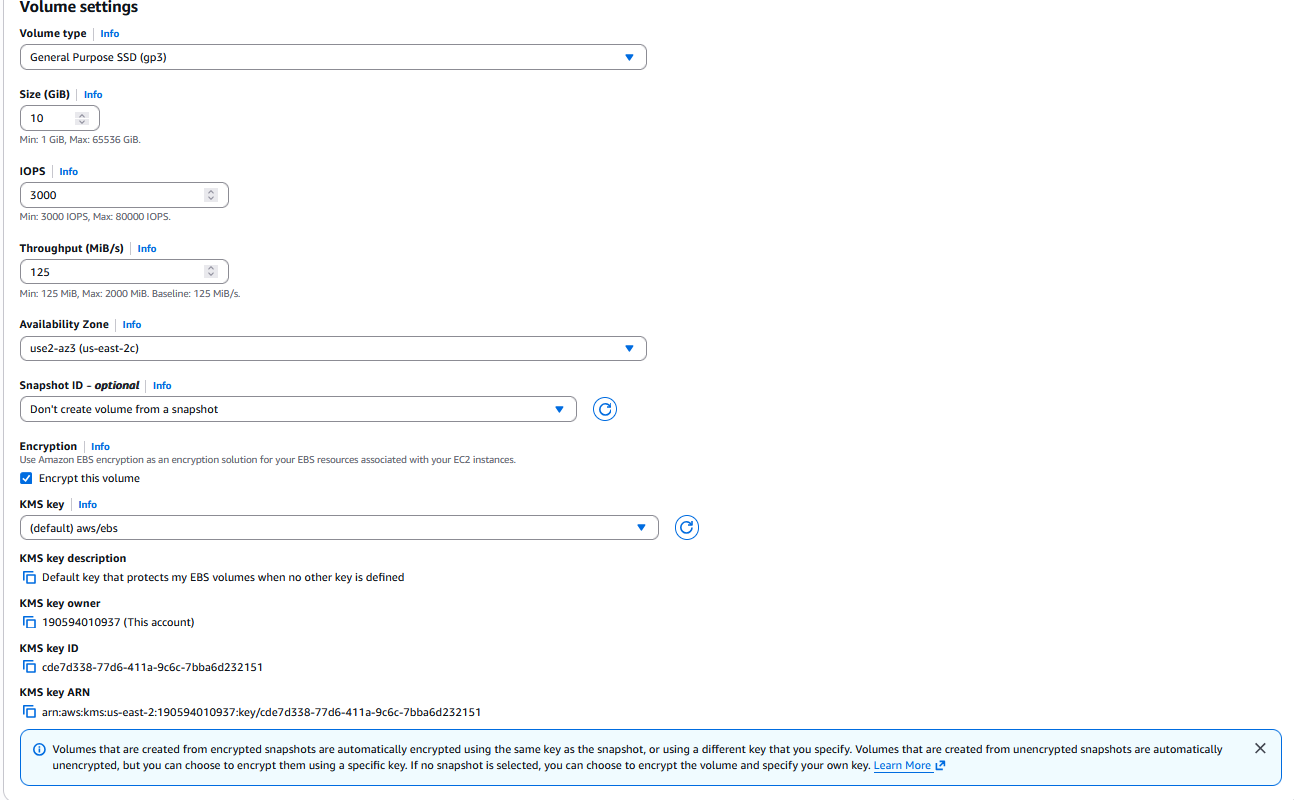
Basic Configuration
- Volume type: Select
gp3(General Purpose SSD) -
👉 gp3 is the latest generation and provides a good balance of price and performance for most workloads
-
Size: Enter
10GiB -
👉 For this lab, 10 GiB is sufficient. In production, size based on your needs.
-
IOPS: Leave default (3000 for gp3)
-
👉 gp3 volumes come with baseline performance. You can provision additional IOPS if needed.
-
Throughput: Leave default (125 MiB/s for gp3)
Availability Zone
EBS allows you to choose between multiple Availability Zones.
- Availability Zone: Select the same Availability Zone as your EC2 instance
- 👉 Important: EBS volumes can only be attached to instances in the same Availability Zone. Check your EC2 instance's AZ before creating the volume.
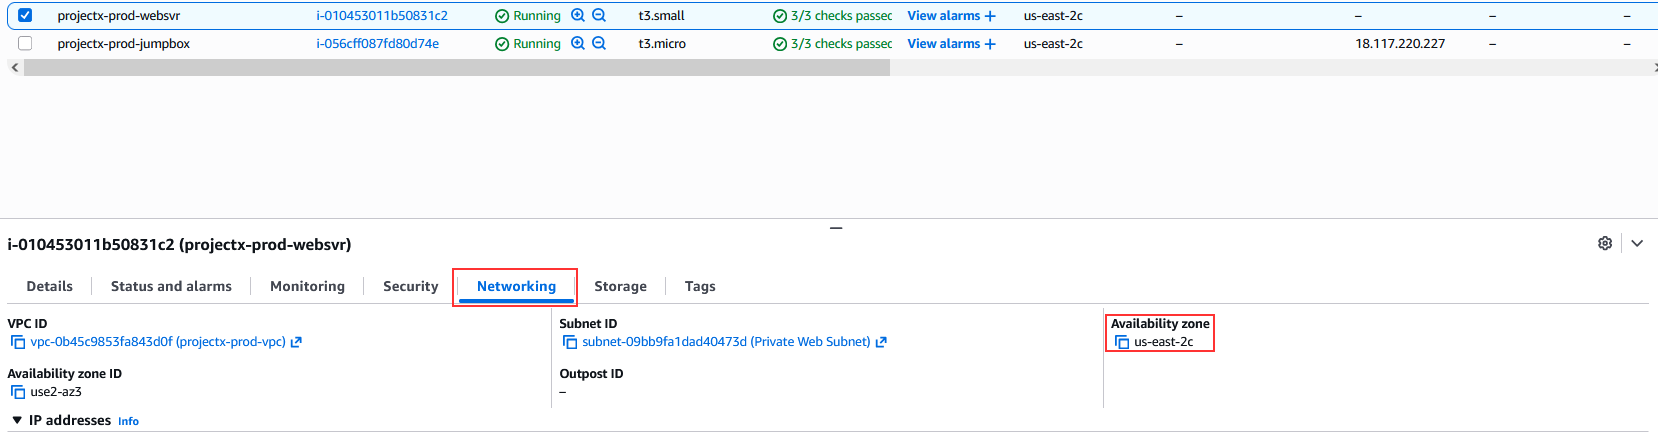
To find your instance's Availability Zone:
-
Go to EC2 ➔ Instances
-
Select your instance (e.g.,
projectx-prod-websvr) -
Check the Availability Zone in the instance details
Encryption
- Encryption: Select Encrypt this volume
- KMS key: Use the default AWS managed key (
aws/ebs) - 👉 Encryption at rest is a security best practice. For production, consider using customer-managed KMS keys.
Snapshot
- Snapshot ID: Leave empty (we're creating a new empty volume)
Create Volume
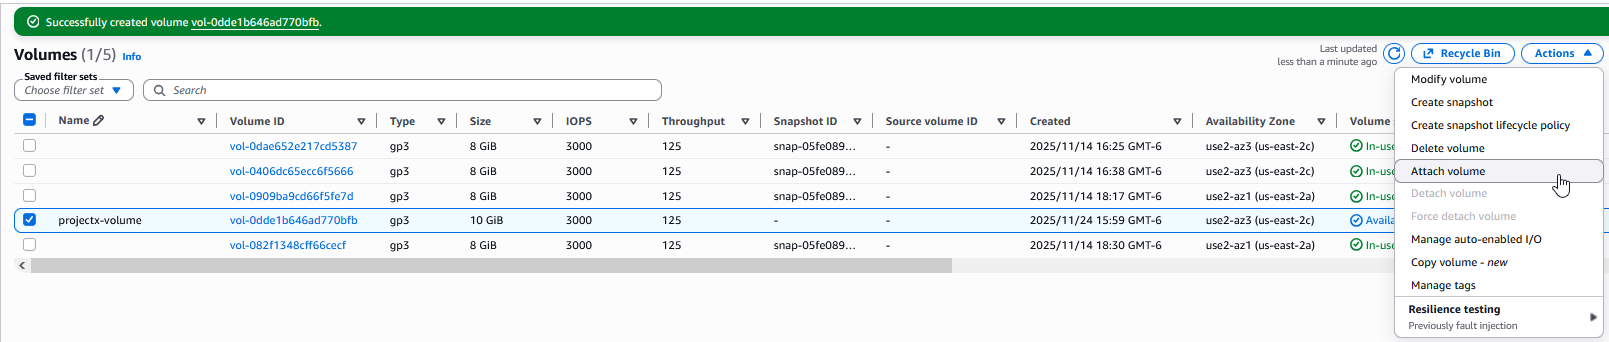
Click Create volume.
Wait for the volume status to change from creating to available (usually takes a few seconds).
👉 Note the Volume ID (e.g., vol-0123456789abcdef0). You'll need this for attaching and snapshot operations.
Attach EBS Volume to EC2 Instance
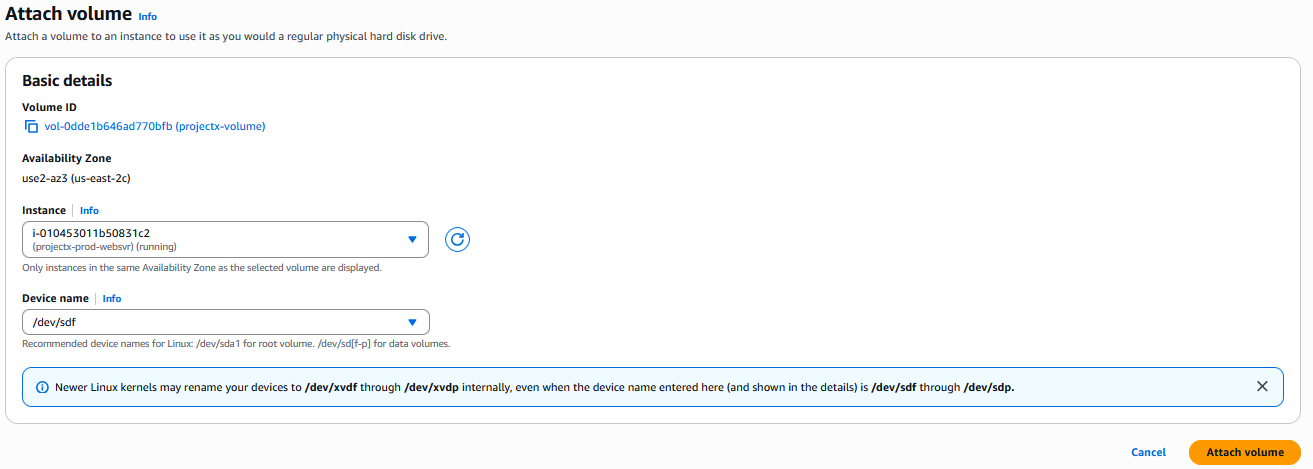
Attach Volume via Console
In the Volumes list, select the volume you just created.
Click Actions ➔ Attach volume.
Configure the attachment:
- Instance: Select EC2 instance
projectx-prod-websvr. - Device name: Use the default or specify
/dev/sdf. - Volume: Your volume should be pre-selected.
Click Attach.
The volume attachment status will change to attaching and then attached.
👉 Note: The device name in the console (e.g., /dev/sdf) may appear differently in the OS. On Linux, it often appears as /dev/xvdf or /dev/nvme0n1 depending on the instance type.
Verify Volume Attachment
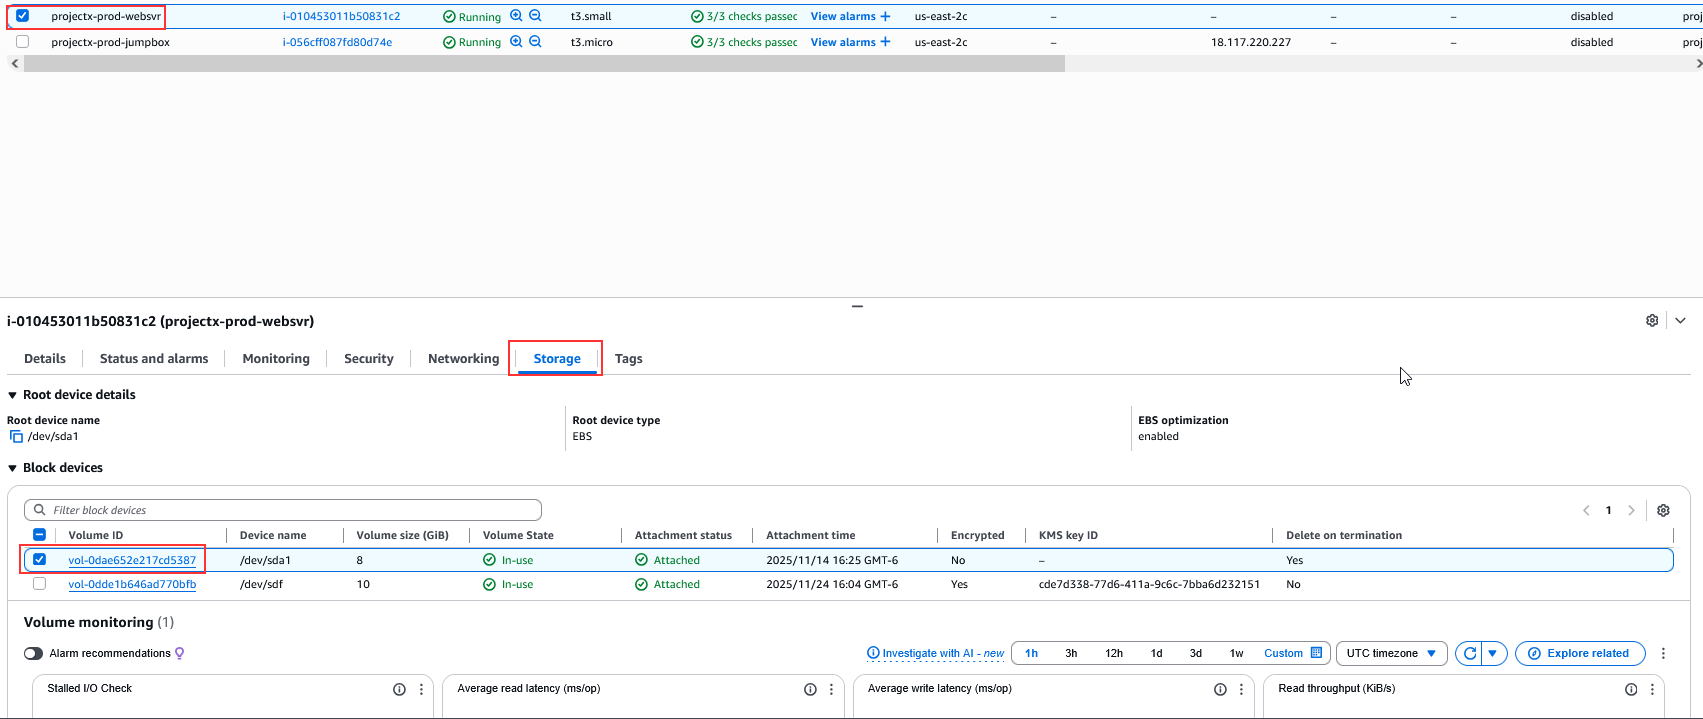
Via Console
- Go to EC2 ➔ Instances
- Select your instance
- Scroll down to Storage tab
- You should see your EBS volume listed
Via SSH
Connect to your EC2 instance through the jumpbox:
# From jumpbox, SSH to your instance
ssh -i ~/.ssh/My-Desktop-Key-Pair.pem ubuntu@<instance-private-ip>
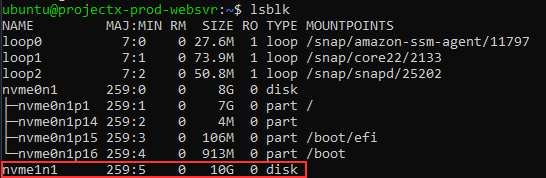
Check for the new block device:
You should see a new device (e.g., /dev/xvdf or /dev/nvme0n1 depending on instance type).
Format and Mount the EBS Volume
Identify the Device
First, identify the device name on your instance:
Look for a device without a mount point (e.g., xvdf or nvme0n1).
👉 Important: Make sure you're working with the correct device. The root volume (usually /dev/xvda or /dev/nvme0n1) should already be mounted. Don't format the root volume!
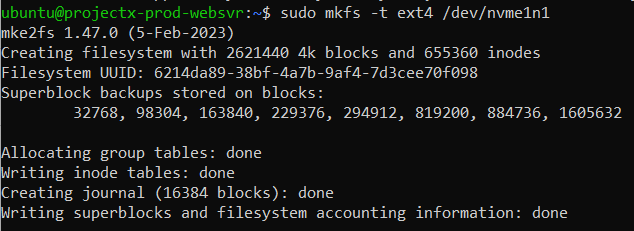
Create a File System
Format the volume with a file system. We'll use ext4 (standard for Linux):
Or if using NVMe:
👉 This will format the entire volume. All existing data will be lost.
Create Mount Point
Create a directory to mount the volume:
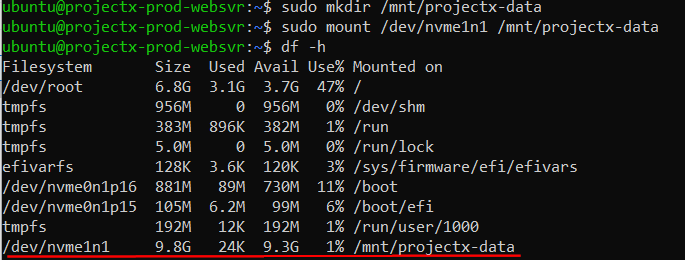
Mount the Volume
Mount the formatted volume:
# Mount the volume
sudo mount /dev/xvdf /mnt/projectx-data

# Or for NVMe
sudo mount /dev/nvme1n1 /mnt/projectx-data
Verify Mount
Verify the volume is mounted:
You should see your volume listed with the mount point.
Test the Volume
Create a test file to verify write access:
# Create a test file
echo "EBS Volume Test - $(date)" | sudo tee /mnt/projectx-data/test.txt

# Verify
cat /mnt/projectx-data/test.txt

Make Mount Persistent (Optional)
To make the volume mount automatically on reboot, add it to /etc/fstab:

Note the UUID (e.g., UUID=12345678-1234-1234-1234-123456789abc).
Edit /etc/fstab:
Add a line (replace UUID and mount point with your values):

👉 The nofail option allows the system to boot even if the volume is unavailable.
Test the fstab entry:
If no errors, the configuration is correct.
Create EBS Snapshot
Create Snapshot via Console
Navigate to EC2 ➔ Volumes.
Select your EBS volume.
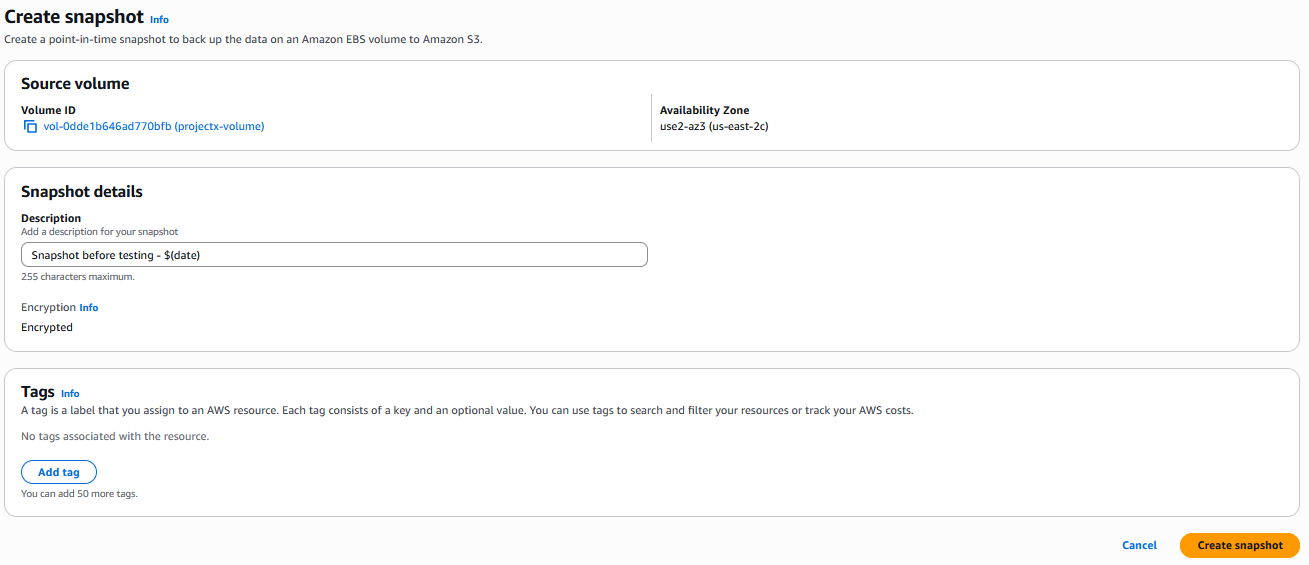
Click Actions ➔ Create snapshot.
Configure the snapshot:
- Name: projectx-prod-ebs-snapshot-1
- Description: Snapshot before testing - $(date)
Click Create snapshot.

The snapshot will be created in the background. Status will change from pending to completed.
👉 Snapshot creation is incremental - only changed blocks since the last snapshot are saved, making subsequent snapshots faster and cheaper.
Monitor Snapshot Progress
- Navigate to EC2 ➔ Snapshots (under Elastic Block Store)
- Select your snapshot
- Monitor the Progress percentage
👉 Large volumes may take several minutes to snapshot. You can continue using the volume while the snapshot is being created.
Verify Snapshot
Once the snapshot status is completed, verify it:
Check the snapshot details:
- Size: Should match or be close to your volume size
- Status: completed
- Storage tier: Standard (default)
Additional Snapshot Items
Snapshots are incremental. Meaning if we were to add more data to the websvr instance, then create a new snapshot, the changes would be reflected in the new snapshot. We could then restore to our original snapshot if data was corrupted.
We can also transfer data from an EC2 instance in any region into another, if we needed to, for example, from us-east-2 to us-west-2.
Feel free to play around with both of these features.
Cleanup (Ephemeral Lab)
Since this is an ephemeral lab, clean up all resources to avoid charges.
Unmount Volumes
On your EC2 instance:
# Unmount volumes
sudo umount /mnt/projectx-data

# Remove mount points (optional)
sudo rmdir /mnt/projectx-data
Detach Volumes
- Navigate to EC2 ➔ Volumes
- Select each volume
- Click Actions ➔ Detach volume
- Confirm detachment
Wait for status to change to available.
Delete Volumes
- Select the detached volumes
- Click Actions ➔ Delete volume
- Confirm deletion
👉 Warning: This permanently deletes the volume and all data. Make sure you have snapshots if you need to recover data.
Delete Snapshots
- Navigate to EC2 ➔ Snapshots
- Select all snapshots created in this lab
- Click Actions ➔ Delete snapshot
- Confirm deletion
👉 Note: Deleting a snapshot only removes that specific snapshot. Other snapshots remain independent.
Verify Cleanup
- Check Volumes: Should show no volumes (or only root volumes attached to running instances)
- Check Snapshots: Should show no snapshots from this lab
Success!
EBS volumes and snapshots are essential for data persistence, backup, and disaster recovery in AWS. Understanding these concepts is crucial for managing production workloads.
Note
Remember: In production environments, implement automated snapshot schedules and test your restore procedures regularly. Always encrypt volumes containing sensitive data and follow your organization's backup and retention policies.