Prerequisites
- VPC
projectx-prod-vpchas been configured. - Public subnet
ProjectX-Prod-Public-Subnethas been created. - SSH key pair
My-Desktop-Key-Pairhas been created and stored locally.
Network Topology
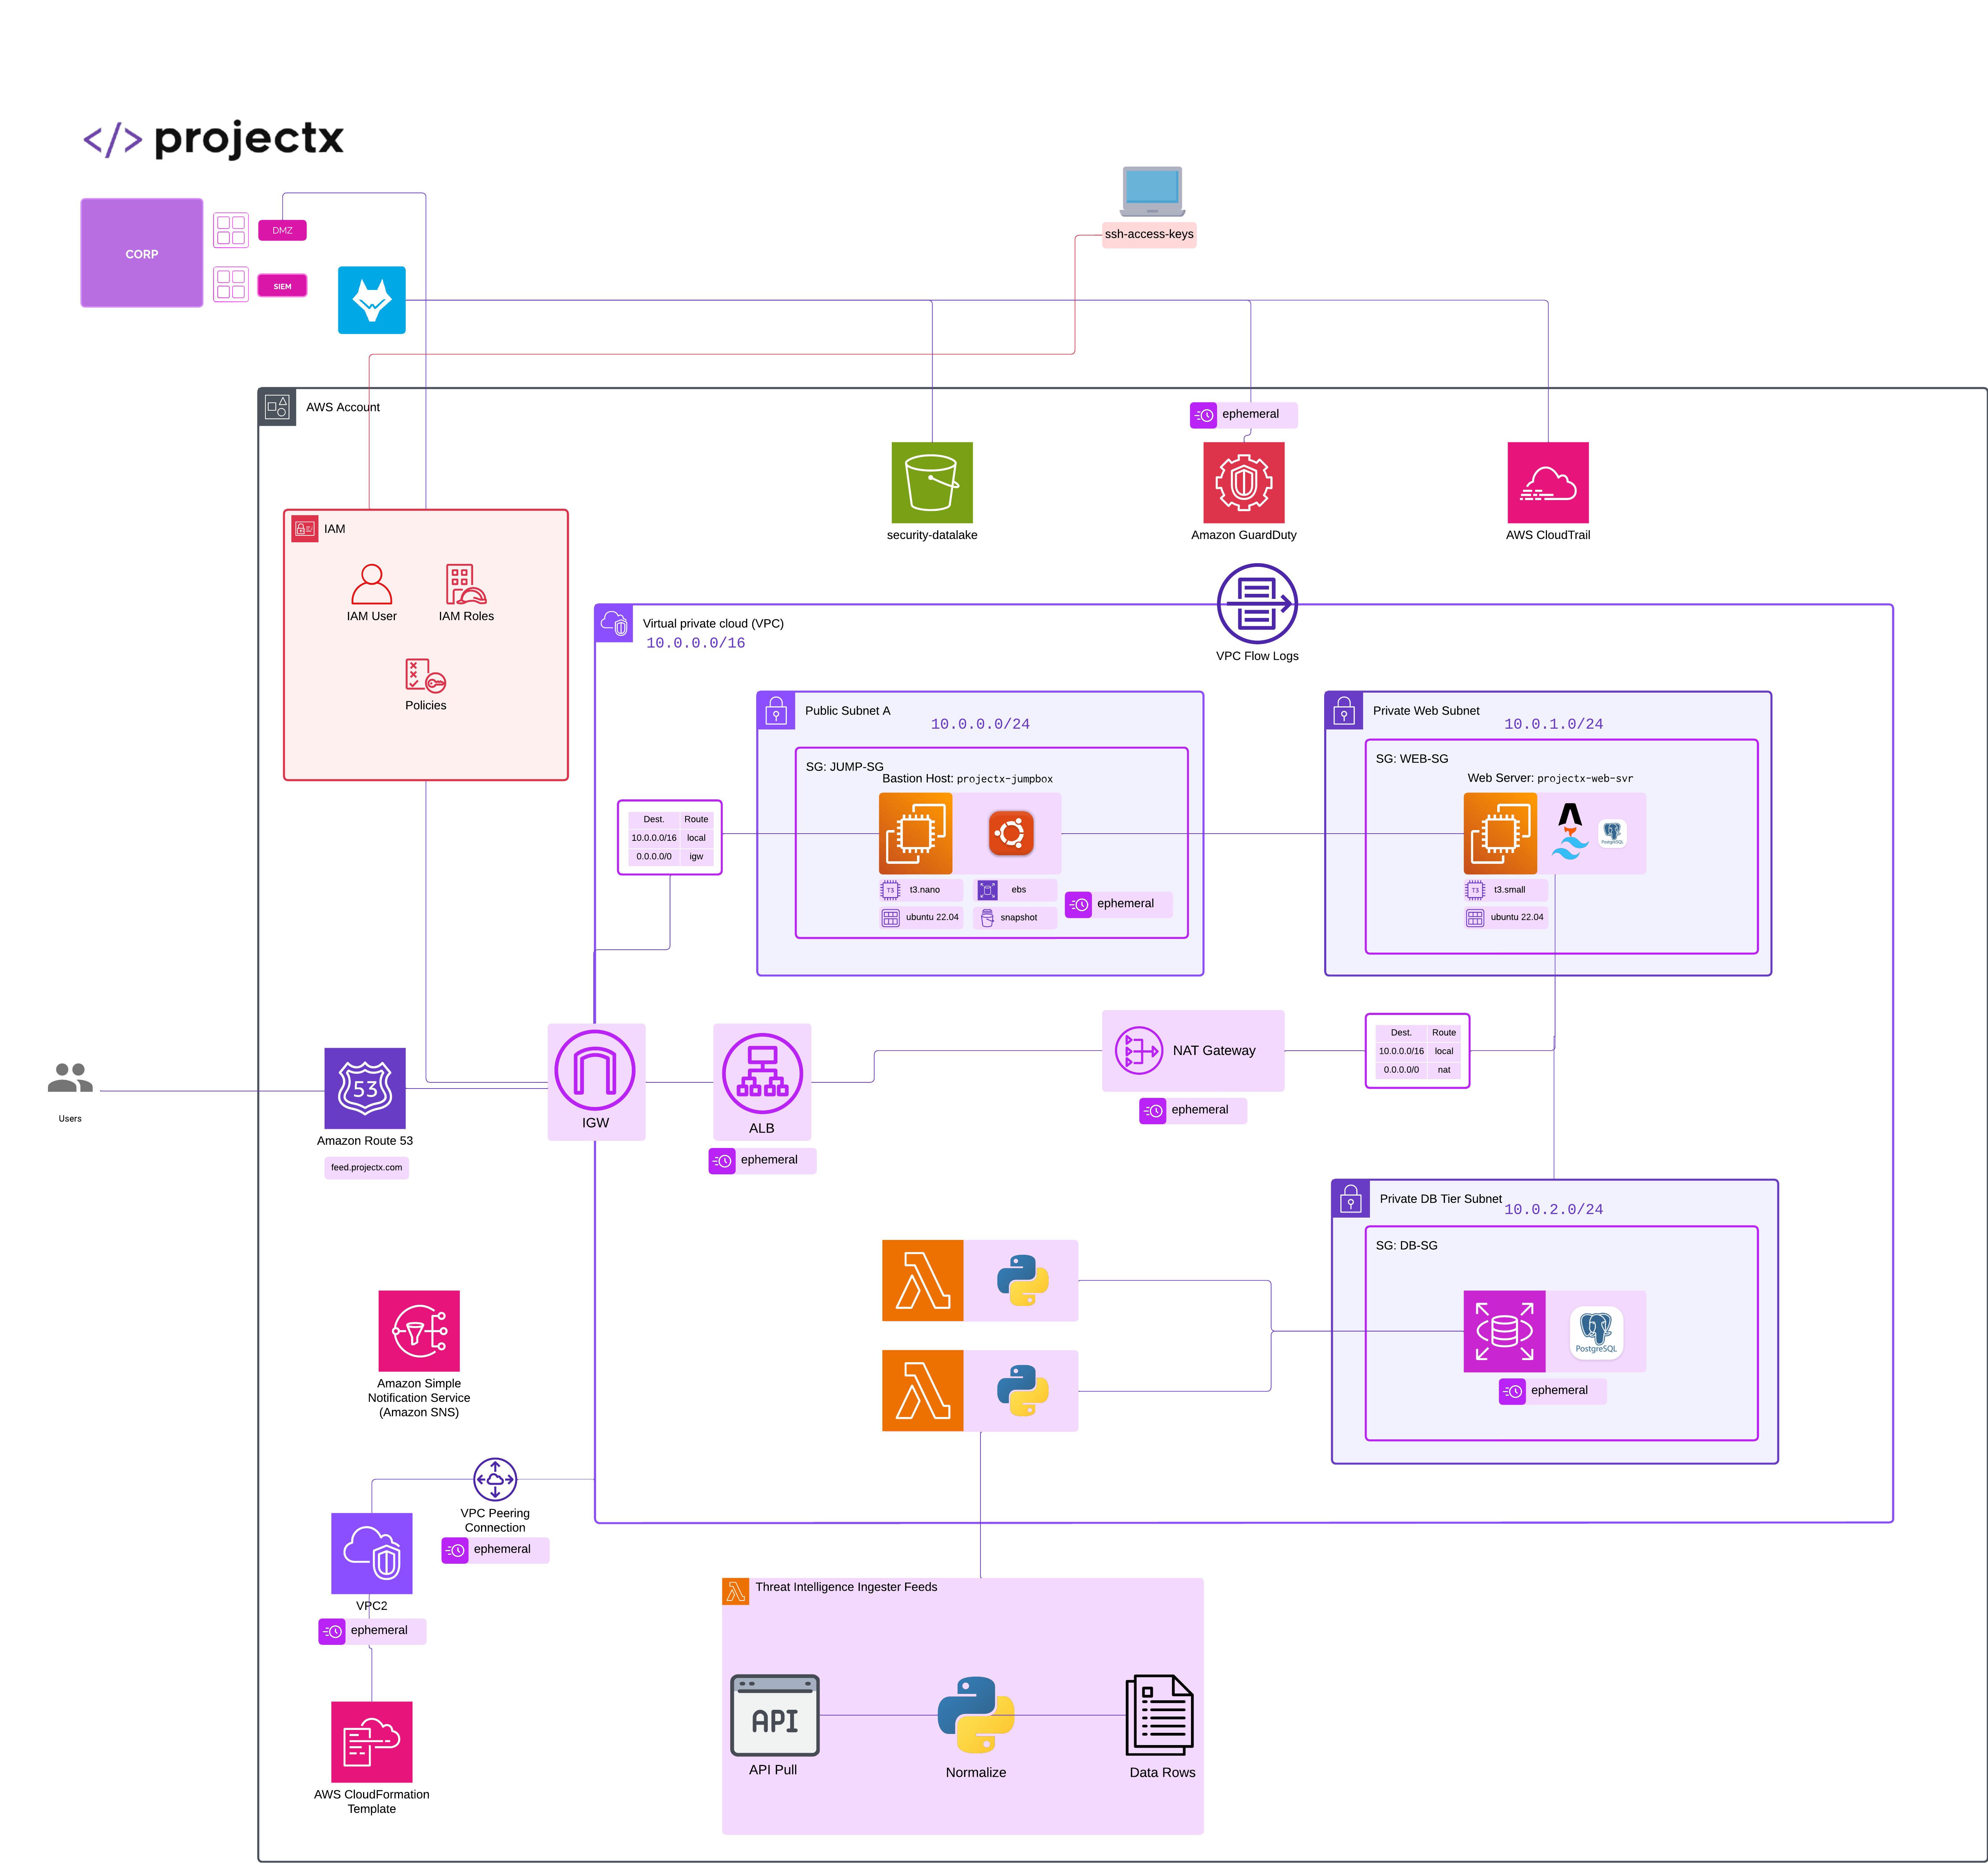
Overview
What is a Bastion/Jumpbox?
A bastion host (also called a jumpbox, we will use them both terms interchangably) is a special-purpose server that acts as a secure gateway to access resources in private subnets. It's the only server directly accessible from the internet and serves as a single point of entry to your private infrastructure.
👉 Restricting Jumpbox Access: It's best practice to restrict your jumpbox to a set of known IP addresses if possible. If the jumpbox must be exposed to all IP addresses, it is recommended to use SSH keypairs instead of basic authentication, or passwords.
Jumpboxes are deployed for a few reasons... They reduce the attack surface by limiting public-facing instances, only a one or a few instances are exposed rather than every instance. Jumpboxes provide centralized a access point for auditing and logging. Here, we could add a logging agent, such as Wazuh to log all authentication or login requests to see if there is an anomaly. Jumpboxes are also easier to maintain and update security configurations.
Deploy projectx-prod-jumpbox
Navigate to EC2 AWS Service.
Select "Launch instance".
Configure Instance Details
Name and tags:
- Name:
projectx-prod-jumpbox
Application and OS Images:
- AMI: Ubuntu Server 24.04 LTS
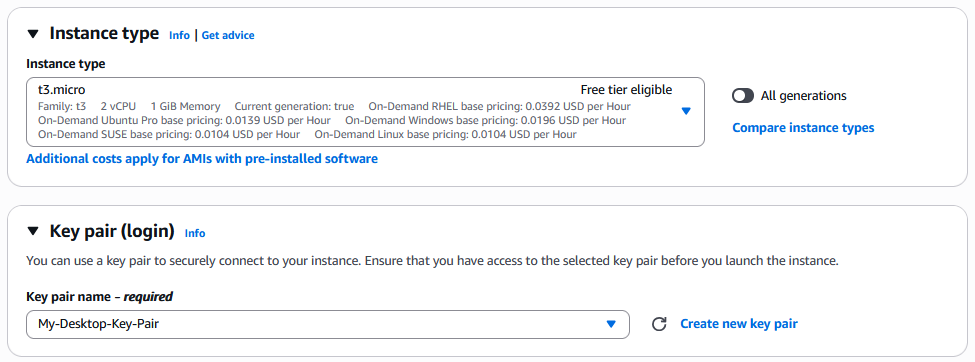
Instance type:
- Instance type:
t3.micro
Key pair:
- Key pair: Select
My-Desktop-Key-Pair
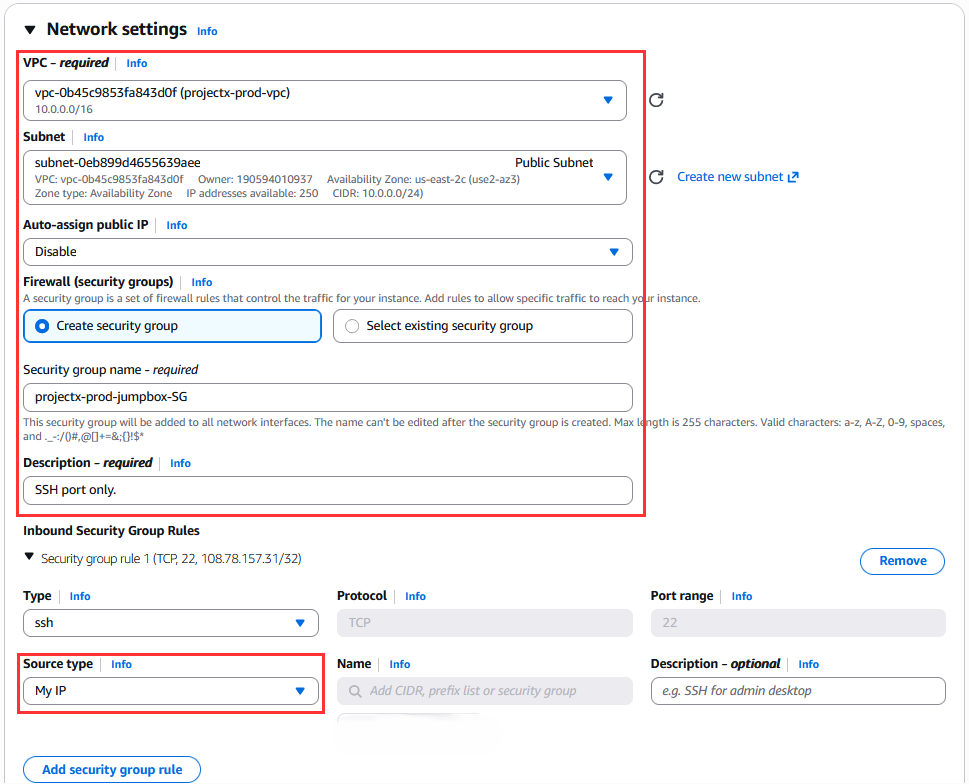
Configure Network Settings
Select "Edit" to configure network settings to deploy the jumpbox into our projectx-vpc, placed in the public Web Subnet, and create a new security group.
Network:
- VPC: Select
projectx-prod-vpc
Subnet:
- Subnet: Select
Public Subnet
Auto-assign Public IP:
- Auto-assign Public IP: Enable
Firewall (Security Groups):
- Security group: Create new security group
- Security group name:
projectx-prod-jumpbox-sg - Description: Security group for ProjectX production jumpbox
Inbound security group rules:
- Type: SSH
- Source type: 0.0.0.0
- Description: SSH access for Jumpbox
👉 "Restrict to My IP Address" option: This restricts SSH access to only your current IP address for enhanced security. If you are configuring this lab in various different locations, then do not restricts the IP address.
Configure Storage
Leave storage settings as default (8 GB gp3).
Advanced Details
Expand "Advanced details" to configure user data.
User data:
Paste the following script to install and configure fail2ban:
#!/bin/bash
apt-get update
apt-get install -y fail2ban

# Configure fail2ban
cat > /etc/fail2ban/jail.local <<EOF
[DEFAULT]
bantime = 3600
findtime = 600
maxretry = 5

[sshd]
enabled = true
port = ssh
logpath = /var/log/auth.log
maxretry = 3
bantime = 7200
EOF

# Start and enable fail2ban
systemctl enable fail2ban
systemctl start fail2ban
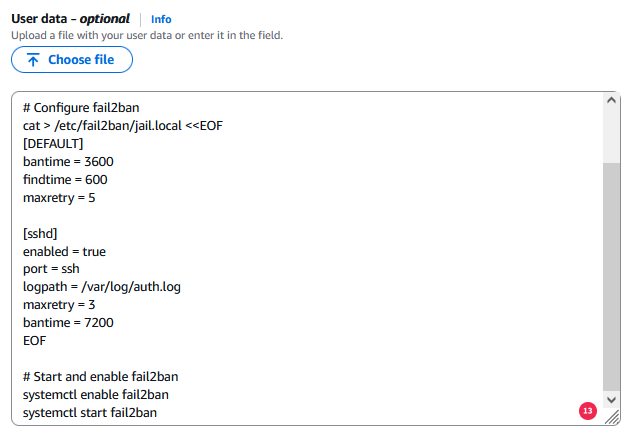
👉 This user data script will automatically install and configure fail2ban to protect against brute-force SSH attacks.
Launch Instance
Review your instance configuration:
- Name:
projectx-prod-jumpbox - AMI: Ubuntu Server 24.04 LTS
- Instance type:
t3.micro - Key pair:
My-Desktop-Key-Pair - VPC:
projectx-prod-vpc - Subnet:
ProjectX-Prod-Public-Subnet - Security group:
projectx-prod-jumpbox-sg(SSH from My IP) - User data: fail2ban installation script
Select "Launch instance".
Wait for the instance to reach "Running" status.
Note the public IP address of your jumpbox instance.
Verify fail2ban Installation
Connect to your jumpbox via SSH:
On Windows PowerShell:

Replace <public-ip-address> with your instance's public IP.
Once connected, verify fail2ban is running:
Check fail2ban configuration:
Verify SSH jail is active:
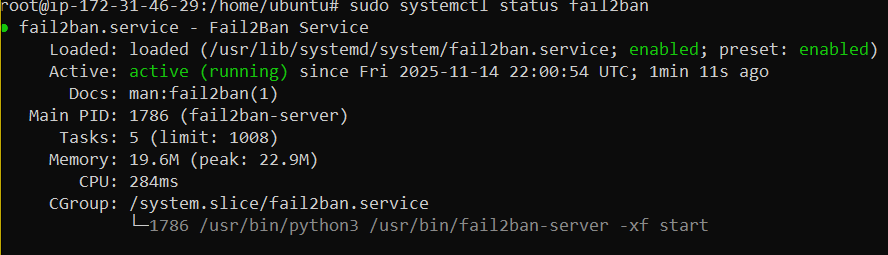
👉 fail2ban should be running and monitoring SSH login attempts. It will automatically ban IP addresses that exceed the configured retry limit.
Access Private Resources
Your jumpbox is now ready to serve as a secure gateway to access resources in your private subnets.
Now, when we want to access private instances in the private VPC subnets, we will perform the following steps:
- SSH into the jumpbox.
- From the jumpbox, SSH into private instances using their private IP addresses.
- And use SSH agent forwarding to avoid storing private keys on the jumpbox.
SSH agent forwarding lets you use your local SSH keys on a remote server without having to manually copy over the private keys to the server.
From your local desktop or machine, enable agent forwarding when going to the public jumpbox.
In order to use the -A option, we will need to enable the SSH agent on our host machine.
Enable SSH Agent
Start-Service ssh-agent
Get-Service ssh-agent  # confirm it's running
ssh-add C:\Users\<username>\.ssh\My-Desktop-Key-Pair.pem
From the jumpbox, we can now ssh directly into additional instances. We will do this once we set up projectx-prod-websvr.
Alternative: SCP
From your local machine, copy the key to the jumpbox:
scp -i My-Desktop-Key-Pair.pem My-Desktop-Key-Pair.pem ubuntu@<public-ip-address>:~/
SSH into jumpbox.
ssh -i My-Desktop-Key-Pair.pem ubuntu@<public-ip-address>
Now SSH to the private instance from the jumpbox:
ssh -i ~/My-Desktop-Key-Pair.pem ubuntu@<private-ip-address>
Change Hostname
Now let's change the hostname.
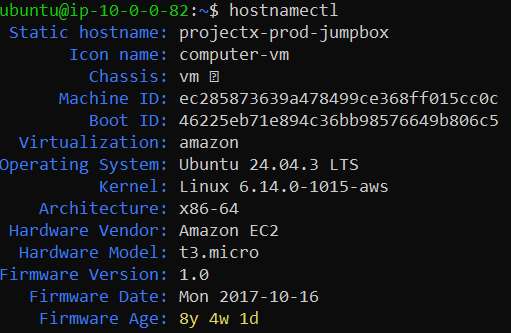
To permanently change the hostname to projectx-prod-jumpbox, connect to your jumpbox and run the following commands:
# Set the hostname using hostnamectl (modern method)
sudo hostnamectl set-hostname projectx-prod-jumpbox

# Update /etc/hosts to include the new hostname
sudo sed -i 's/127.0.0.1 localhost/127.0.0.1 localhost projectx-prod-jumpbox/' /etc/hosts

# Verify the hostname has been changed
hostnamectl
Alternatively, you can manually edit the /etc/hosts file:
Ensure the file contains a line like:
Success!