Prerequisites
- Valid Credit or Debit Card.
- Frequently Used Email Address.
- Password Manager (Recommended)
Network Topology
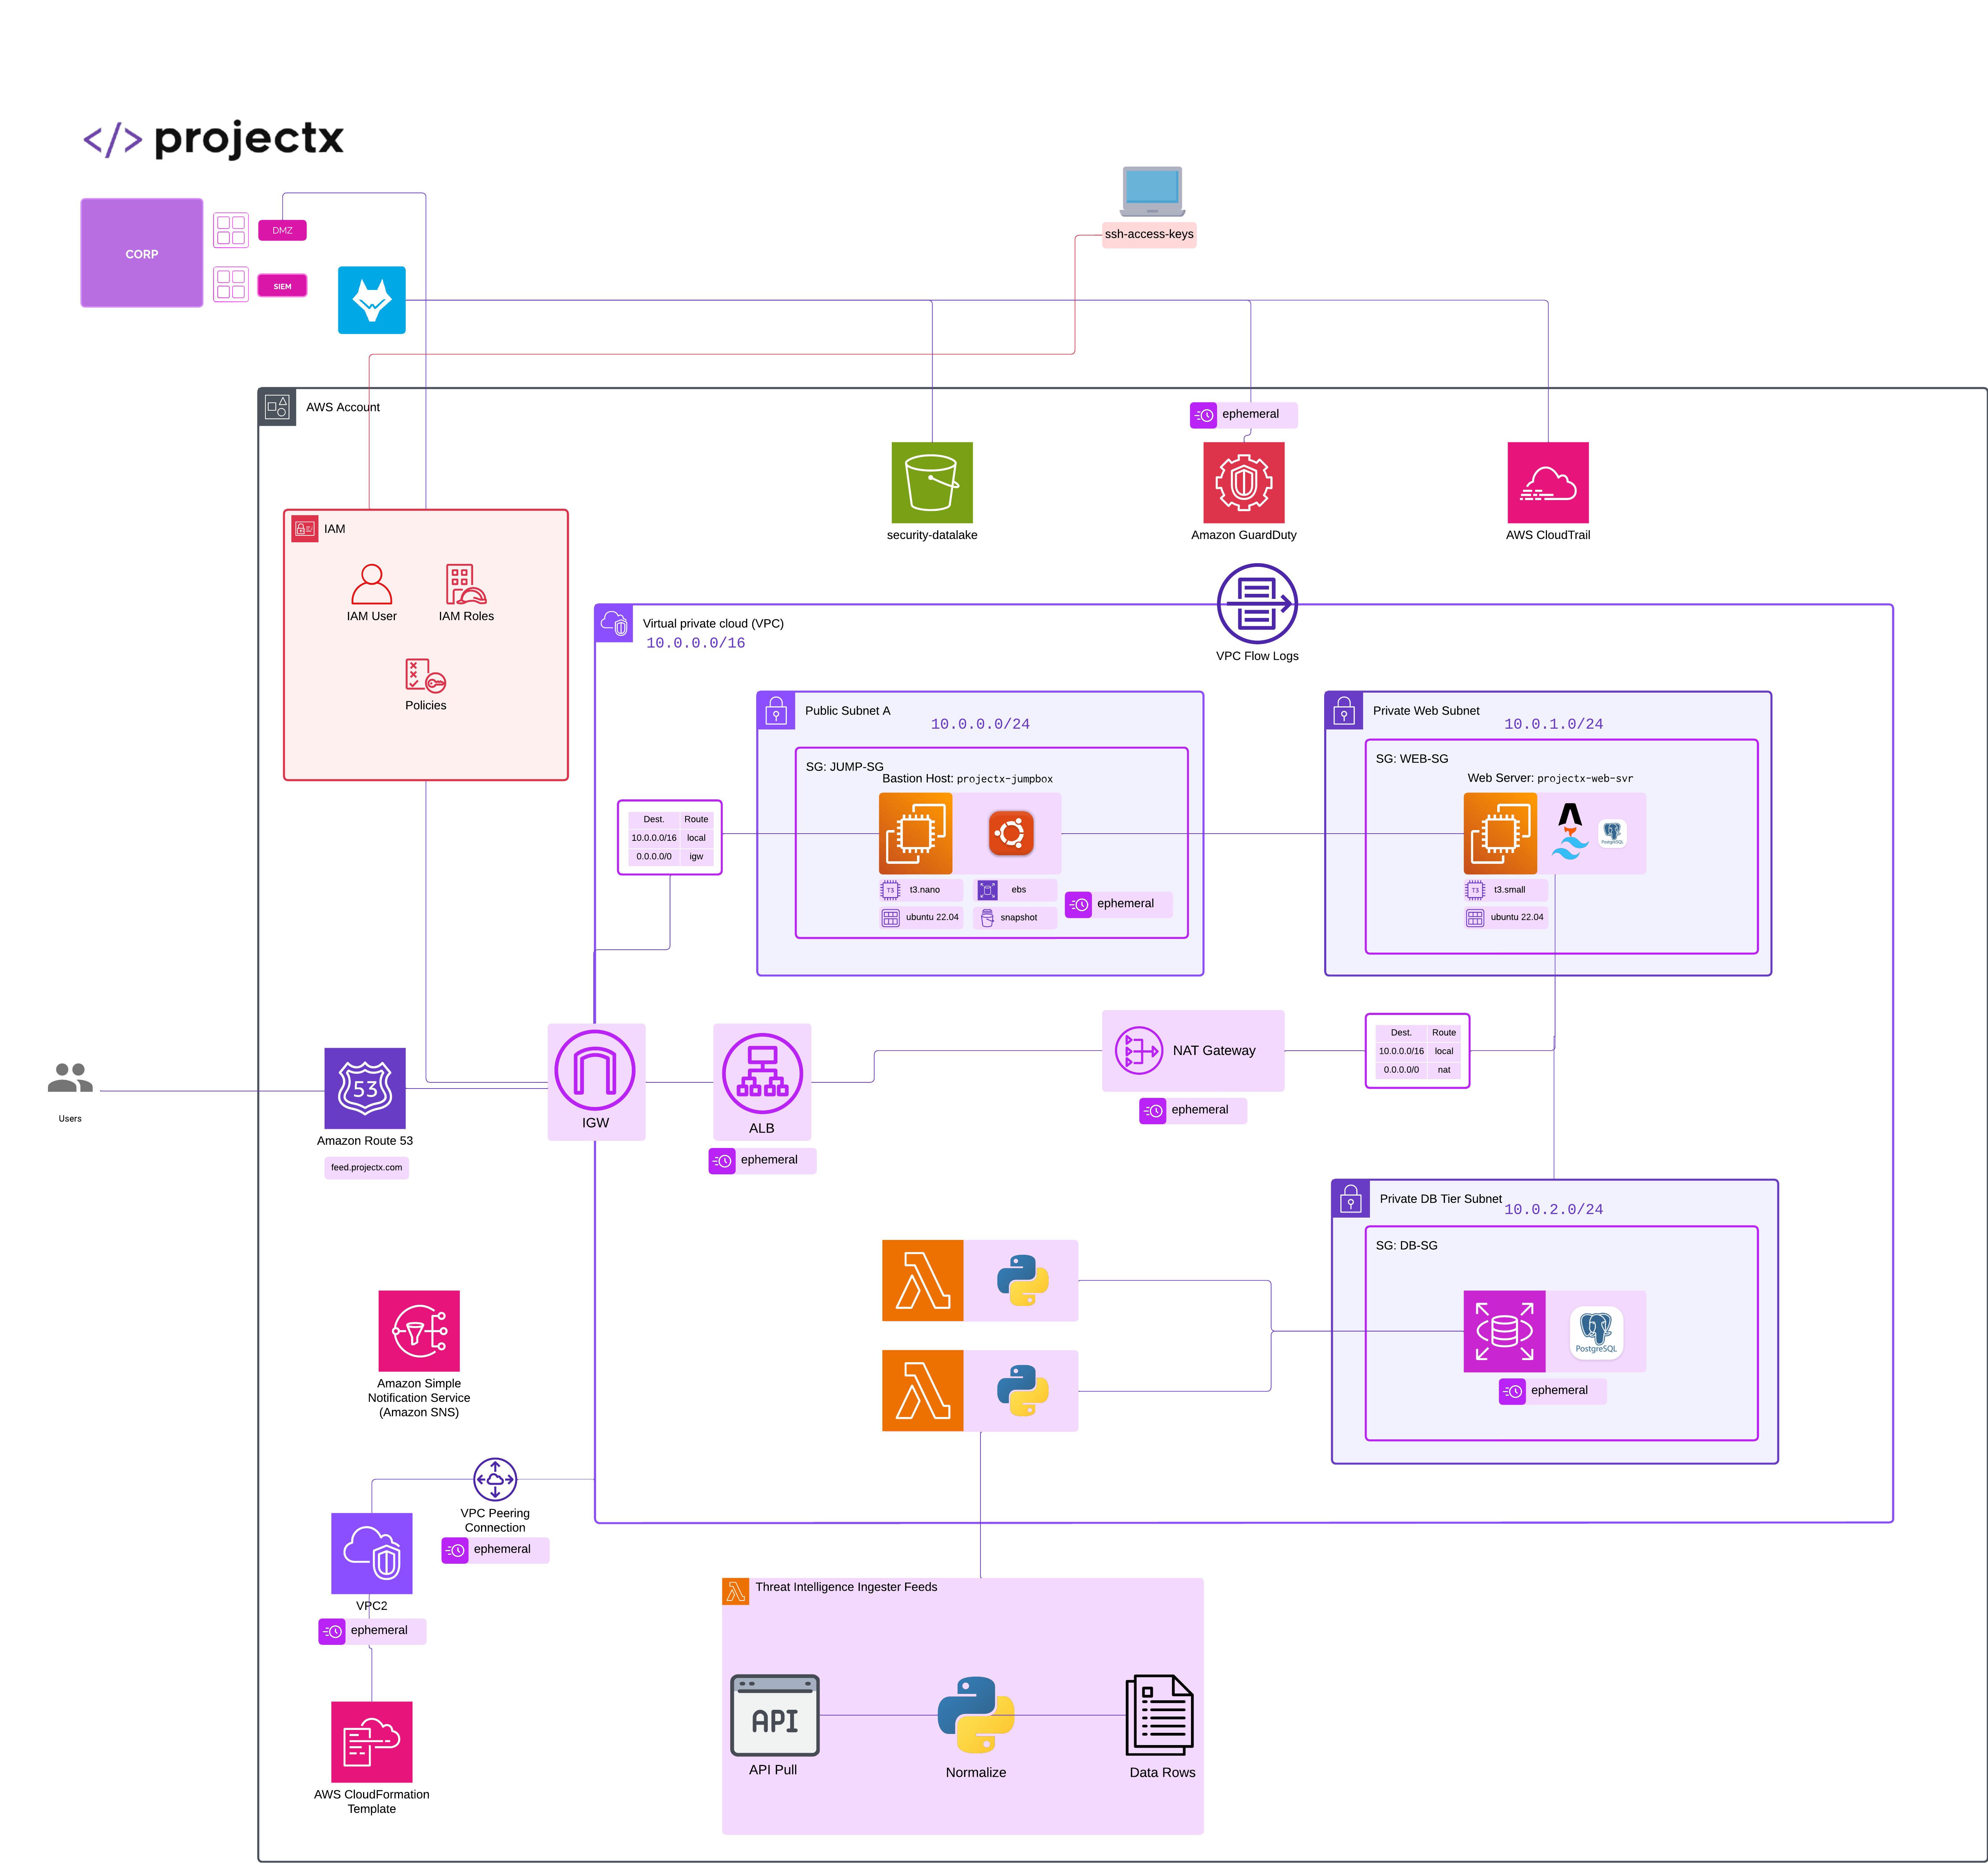
Overview
Create AWS Account
Go to https://aws.amazon.com/
Enter your:
-
Email address (this becomes your root user)
-
Password
-
Account Name (e.g., “ProjectSecurity-Labs”)
Choose your account type:
- Personal (for most homelabs and learning)
Verify email using the code sent by AWS.
Enter payment info – a debit/credit card is required, but AWS Free Tier credits apply automatically.
Identity verification:
- You’ll receive a text or call for verification.
Select support plan:
- Choose the Basic (Free) plan for now.
Once signed in, you’ll see the AWS Management Console.
Setup Billing Invoice
In the AWS Console, open Billing & Cost Management.
Go to Billing Preferences → check:
-
✅ “Receive Billing Alerts”
-
✅ “Receive Free Tier Usage Alerts”
Click Save preferences.
Setup Budget
Go to the Budgets section in the Billing dashboard.
Click Create budget → Cost budget.
Set:
-
Name: Monthly-Lab-Budget
-
Period: Monthly
Budget amount: $20 (or your comfort level)
Leave the default Alert thresholds.
Choose email notification recipients.
Create the budget.
If your AWS bill reaches 85% or above, you will recieve an email. Or if your forcasted budget is expected to hit or exceed your set budget.